Photobucket Photobucket Photobucket Photobucket Photobucket Photobucket Photobucket
Showing posts with label sewing. Show all posts

Friday, May 31, 2013

Shop Update

Hi everyone! I hope you're all ready for Friday.

I've been sewing like crazy lately, it seems. I am working on some custom projects for a couple of people and sneaking in items for the shop in between.

I've really been trying to experiment with different fabrics and styles. Today I spent the day working with faux leather or pleather, if you will. It's soft and has a nice texture but you definitely have to line it or else you're going to stain your dolls. I've heard some horror stories of people who didn't line or didn't put tights on their doll and the pants stained the legs badly.

I wanted to share with your some of the pleather dresses I just put up in the shop. I hope you like them.

 photo 8924970d-7116-4cda-bcc7-6fe158215600_zpscc4bde53.jpg


Take care!

Saturday, May 25, 2013

Making Doll Clothes Tutorial - Sewing With Knits

OK! This is for everyone who asked for tips on sewing knits. These tips can also be applied to soft and slippery fabrics such as chiffons, light gauze cottons, satins, silks and really just about any fabric your machine wants to eat or doesn't want to feed right. If you are familiar with sewing knits for people, some of the things I do might make you freak out and say THAT'S NOT RIGHT! I know, and I'm sorry for that. I have learned to adapt some methods for doll clothes. Because their bodies don't bend and stretch and move like ours, you can adapt. I am also writing this for basic use. Meaning no special machine attachments like straight stitch plates, special presser feet or a walking foot. This is just for basic sewing.

WHAT ARE KNITS?

Knits are made by fabric being looped together rather than multiple threads being woven across one another like you find in broadcloth. It's the same as knit and purl used in hand knitting. Basic knit has a right and wrong size. The right side has a vertical rib and the wrong size is horizontal. Knits typically do not fray unless it is a loose knit like a sweater. This means you don't need fray check! The edges will sometimes roll. If your knit doesn't have nylon, polyester, spandex or another meltable synthetic in it then its okay to iron out that roll to make things easier. Also try to avoid stretching your knit as this will create the rolling.

Most knits are stretchy just from the process of the knitting. However, some have added or controlled stretch by introducing fibers such as spandex or by using different knitting techniques such as in double knits. Some various types of apparel knits are jersey, double knits, sweater, rib, fleece and swim suit/dance knits.

Jersey - Most common. T-shirts are considered jersey. Varied thickness. Basic stretch quality unless blended.
Double Knits - Heavier knits that don't cling and drape like jersey. A lot of women's office wear is double knit. Thick. Minimal controlled stretch.
Sweater - Knitted yarn fabric. Often made with wool. Thickness varies. Stretch can vary depending on yarn thickness and type used.
Rib - The most basic way to describe this is the white mens undershirts that look like tank tops. That's a ribbed knit. Typically thin. Very stretchy.
Fleece - Common. Sweatshirts. Can be fuzzy on one or both sides. Easy to work with. Varied thickness. Minimal stretch.
Swim Suit/Dance Knits - I often call these spandex but they're not. They do have high amount of spandex in them though. Or nylon. Or both. They retain their shape better when wet and can stretch back into shape. Imagine wearing a bathing suit made of a t-shirt. You might look cute but once you get wet you will look naked because it absorbs water, stretches and gets weighted down. Typically thin, Can be thicker such as workout clothing. There are very thin versions usually beinge and black used for lining. Controlled stretch.


WHY STABILIZER IS AWESOME?

Most of the time when your machine is acting up and eating fabric, it's not mechanical, it's the fabric or a stabilizer problem. I know some people have heard me say stabilizer a million times but may not realize what it is. Stabilizers are designed to support your fabric when it needs additional weight and grip to get through a sewing machine. You may not have realized that parts of your clothes were sewn with a stabilizer because a lot of the time it is removed. In some cases, like embroidery there may be a patch cut around the embroidery. You may have seen it then when you got shirt with a logo on it or something. The reason they left some of it there is because tearing to close to the stitches hurts the structural integrity of the embroidery.

Back to standard machine sewing though. There are 4 basic types of stabilizer. I say basic because there are actually dozens of types of stabilizer but we want to be concerned with something that is removable for sewing our doll clothes. The 4 basic types of removable stabilizers are tear-away, cut-away, heat-away and wash-away. That first part tells you how the stabilizer is removed. I recommend tear-away or cut-away. You can get stabilizers at any sewing store but I recommend using coffee filters for these small pieces that we sew on doll clothes. You can get a large pack of 100 or more for a couple of dollars. They easily tear away and also have a ton of other uses around your house if you want to google that. (One of the best is sifting wine to get out broken cork or glass pieces - and they are lint free when cleaning windows.) I'm just saying - coffee filters are life changing. And I don't even drink coffee.

If any of you have one my jumpers or a dress with a collar and wonder how I do those tiny stitches on the edges....it's stabilizer. The reason your machine tends to eat your fabric is because the presser foot is designed to push your fabric down with enough pressure that the feed dogs below can grab it and move it along. When your fabric doesn't reach far enough across that presser foot/feed dog area it leaves your fabric slack and loose. If you've ever sewn through a flat head pin, or your finger (it happens) or a button, or had a needle shatter into pieces and come shooting out at you from your machine, then you already know that the needle carries a lot of force behind it. If your fabric is slack because the presser foot/feed dogs can't do their job then that needle is going to slam down and shove that loose fabric right under the plate and into the shuttle area. Sometimes it's a few stitches or more before you realize it's happening and you end up with that crazy birds nest of thread and in some cases a nasty hole in your fabric.

Stabilizer works to combat this. For most fabrics, one layer of stabilizer on the bottom of your project is enough. For some fabrics like chiffons and silks, you might want to sandwich your fabric. I am sure that you all know that when sewing seams the right side of your project should always be on top. Which also makes it hard to see what is going on with your seam underneath. The stabilizer will take away that guess work because your seam is on top of it. You want to use a large piece of stabilizer. Give it a several inch cushion outside of your fabric to both the left and right of your needle. This will make the feed dogs rely entirely on moving your stabilizer and give it something to grab. It also protects delicate fabrics from micro snags caused by the feed dogs.

After you have sewn your seams, pull your threads through to to the wrong side of your project, tie them off and trim. You can now start tearing away your stabilizer. Go slow and don't pull harder than is necessary or tear to large of an area at a time. I like to work in tiny areas. Another option is that if you have a pair of tiny embroidery snips you can trim the stabilizer very close to the seam and the other side will just pull away. The drawback to this is that sometimes you will snip one of your stitches so be careful! Any other little bits can be pulled away with tweezers.

Its pretty important that you use stabilizer on knits. Why? Well knits stretch. A lot. And this makes your machine do bad things. The machine knows when you are cheating and doesn't hesitate to remind you of it by doing something awful and gross to your project. In my house that ends in swearing and if it's 3am, there might be tears. Sometimes me. Sometimes the machine. It makes this sad emoticon with a tear when I upset it. Do you always have to use stabilizer on knits? No. But you just said.....I know, I know. But if you have adjustable pressure capability on your machine for your presser foot and use are using a not so stretchy knit and are very familiar with how your machine acts when sewing knits, you can sometimes get away with it. I say this because sometimes I don't use stabilizer. You will get to know when you need it and when you don't. And sometimes you will think you don't and learn otherwise. It happens. Always run a test piece that's as long as your project through your machine to see how its going to act. I won't mention any names, but [i]Jessica[/i] sometimes skips this and I regret it miserably.

OTHER RECOMMEND TOOLS

Other things that are recommended when using knits - a ball point needle in your machine. They may also be called stretch needles. Ball point needles are better than sharps because they don't stab your fabric and they won't snag. They are designed to slide through the looped texture of knits. I am not going to lie, I don't use ball point needles very often. For most of my doll sewing I use a basic needle. I have never had a problem. You will have to test out your machine. If you feel that you are getting snags, put a new needle in and try again. You should change your needle often. If you still have problems, then you may need a ball point needle.

Do you need fray check? No, you shouldn't unless you are adding in another fabric that frays. Most knits won't fray at all. However, some knits, like sweater can and will unravel. How do you stop this? You need to sew a zig zag finishing stitch (like a serger) over the edge of your fabric BEFORE you start sewing your pieces together. It's best to do immediately after you cut your piece out so that it doesn't unravel while you are working with it.

Pins are helpful when sewing pieces of knits together. You can pin right onto the stabilizer. But the addition of pins will change your pressure. Sew slowly when you use pins. As you are sewing you will notice that while your fabric is fine on the bottom the presser foot is stretching your fabric. Every so many stitches stop and raise your presser foot, keep your needle down into your fabric. You are just doing this to relive the pressure and being up the slack. If you can program your machine turn on the auto raise setting so that when you stop sewing your needle remains down and your pressure foot raises on its own.

DO I NEED SPECIAL SETTINGS OR STITCHES ON MY MACHINE?

Not really. You should already be using a smaller stitch length when you sew doll clothes anyway. Your machine will guide you on what it likes. My machine is happy with a 1.6 straight stitch. If you are sewing two pieces together you can or may want to finish those edges together with a zig zag stitch. Just make sure you don't go beyond your straight stitch.

Do I need to use a zig zag stitch? You may want to use a zig zag stitch at the top of things like tights socks. This gives the stitches the opportunity to stretch with the fabric and will reduce popped stitches. You don't always need a zig zag stitch on every knit though. Sometimes a straight stitch is fine.

AM I READY TO SEW KNITS?

Do you have a coffee filter, some knit fabric and a sewing machine? Then yes! YOU CAN DO IT! It's easier than you think and really the big deal is stabilizer.

Questions? Ask them please!

POST LINKS YOUR PICS HERE! I WANT TO SEE WHAT YOU MAKE.

SPECIAL ANNOUNCEMENT! I'm working on my own patterns to add to my Etsy shop. The first pattern will be for t-shirts for Neo Blythe and Middie that don't need a closure. Keep an eye out, it should be posted in a few days!


Friday, January 25, 2013

Weekly Recap

This was a fairly light week as far as creating for me. I wish I could have done more but there was a lot of administrative and behind the scenes work going on this week. You know, all of the intangible time-sucking things that you have to do because you are a one person show.

Don't get me wrong. Some of this time suckers are fun. Like message boards and pics. And some of them are tedious and necessary like researching new postage rates, pricing supplies, registering for tax id numbers, setting up income and expense charts. You know, THAT stuff.

As a special note. Postage rates are increasing on January 27. Please keep that in mind when ordering from the shop. I have not yet increased my rates, so order while you can save some money. Especially all of you International folks! US rates are doubling for International shipping.


Molly wants to tell everyone to have a great weekend and stay warm! It's cold here in Chesapeake and there's actually snow to which she says: "I am not amused." So Molly will be snuggled up in blankets until this passes!

Sunday, January 20, 2013

I Love Blythe

My newest obsession are Blythe Dolls. Well, I guess I shouldn't exactly say new. I've been telling my husband about them and looking at them for months now. What is new is that now I own some. OK, I own four. And I love them. All of the pics in today's blog are showing three of my girls and all of the dresses are made by me and have sold or are for sale in my shops.

What are Blythe Dolls? Well, for those of you who aren't familiar I will give you a little run down. In 1972, a USA toy company called Kenner (now Hasbro) produced a doll with a small sized body and big color changing eyes. The eyes change color and position with the pull of a string. Kenner sold the dolls for about a year but sales were low and they were deemed to scary for children.


People who owned and collected the dolls had a special love for them and took beautiful pictures showing the dolls in various outfits and situations. In 2000, a photo book was published showing off Blythe and in 2001 a Japanese company called Takara started producing the dolls again. These are not for kids to play with. The dolls are expensive and many are limited edition.


What makes them so special? What makes anything special? The love people have for it. As opposed to Barbie, Blythe is much more customizable. There are many artists out there who do face customization. From matting the skin so that it isn't so shiny, changing the eye-chips, changing eyelashes, carving noses, mouths and expressions and adding make-up, freckles and lipstick. The dolls come with a plastic saran hair texture like most all dolls do. Typically they have pretty awful haircuts. Many people care for their hair, recut and style it. There are also methods for re-rooting their hair so that you can use different materials and colors. I haven't yet attempted a re-root but I have been using Mohair wigs. They're fun, colored and curly. I do plan on customizing some of my dolls. Two are already customized.


Another big deal with the Blythe dolls is fashion. Which I am happy to announce I am taking part in. Lately I've been a bit tired and burnt out from making purses. I feel limited in creativity with them and I don't think they leave me, personally, a lot of room to think outside the box and really add creativity to them. I tend to make purses that I want to carry and everything I make looks like something in my closet. Not that there's anything wrong with that. I feel I have a fun, quirky and enjoyable taste. But I am just a bit over making them. So I have started making dresses and clothing for Blythe. And I love it.

The tiny details that I can put into a garment are fascinating to me. I love making a beautiful dress that is outside of my style. It's easy for me to be more creative because I'm no longer thinking, would I want to be seen carrying this? I just couldn't ever break myself from that.


The dresses I've been making are quite honestly, fabulous. My knowledge of construction and my sewing ability from making so many bags has added skills and techniques to my range of knowledge that I didn't even realize were there. I immediately jumped right into the most complex dresses I could. And they were easy and adorable. Right now I am in love with a drop waisted peter pan collar dress. And I'm not the only one. I have yet to have one sit in the shop for more than 24 hours. Which is exciting to me. Very exciting because I love when people love my art.

I understand that a lot of people find them creepy but if you take the time to google more about the Blythe dolls and look at some of the photogroups on Flickr you will start to see the beauty and enjoyment in them. I hope to bring you all more great pics of my girls and many more beautiful outfits and dresses for yours!

Thursday, January 10, 2013

Projects For the Start of 2013

I've been a busy bee lately. I have been working on custom orders since Thanksgiving. I do love working on custom orders but they were just taking up so much of my time that I couldn't work on anything new for the shop. I hadn't added anything new since sometime in late October or early November. Well! I finally finished up the last of the custom orders and was able to start on some of my long list of projects this week.

I was also able to use my new camera to take pics. It's an 18 megapixel camera that does so many things I doubt I will ever use all of the features. That does't diminish its awesomeness though. I tried out a new backdrop method and it was the perfect piece to the puzzle. The pics came out beautiful and professional looking and the white backdrop was perfect for adding my watermark in Photoshop.

Everything shown below is now listed in the shop. You can click on the link or click the SHOP button above.


Wednesday, December 26, 2012

Dolls and Daydreams Wednesday Addams Pattern Review

I want to start by saying welcome to all of the new readers! Whether you found me from a link, or a giveaway or randomness thank you for following. One of my resolutions is to blog more so I hope to start bringing more content to all of you.

I hope you all had a wonderful holiday! Did Santa bring you what you wanted? Did you at least get a good gift card so you can get it yourself? Hubs was sweet enough to get me a Joann's gift card and my Mom sent me a gift certificate to Urban Threads. It was a very Crafty Christmas.

I also took a couple of days off because I really needed them. I am down to a few custom orders and while I was waiting for fabric to arrive I took advantage of the time to enjoy the hoiday. I didn't go into my studio for two days. It kind of killed me but at the same time it was a nice break. I don't often take the time to sit on the couch and watch TV or flip through magazines or books anymore. It was a good change of pace. They were quilting books and craft magazines but it was nice to finally read them. Although it gave me dozens of other ideas of things I want to work on.

I did spend Christmas Eve making something I wanted to work on and not something I had to work on. Some of you may have seen pics on my Facebook, Instagram or Twitter feeds. If you didn't, you're in luck! Here they come!

I found an adorable pattern from Dolls and Daydreams for a Wednesday Addams doll. And I had to make it! I actually had all of the fabrics I needed here in the house to work up a sample. Including a black and white striped t-shirt for her tights. This is going to be the problem fabric in the future. I've been searching around online and in all of my local shops and I can't find anything like it. I'm going to check some of the thrift stores next. If anyone knows where I can get fabric like this please let me know. I'm also going to try a fabric pen and white cotton to see how it looks if I make my own.

I've never made a doll before so I wasn't too sure about the construction. I found the pattern easy to follow. The mistakes I made in the pattern were only because I didn't follow it exactly. I was able to download a digital pattern from the Dolls and Daydreams website. As a guess I would say Sarah has about 60 patterns, maybe more. The pattern was a PDF and had 29 pages full of instructions and color pictures. I typically only print out pattern pieces to save paper and follow the pattern from a netbook I have in my studio.

The pattern was well put together and after making the doll I can say that it flowed nicely. She rated this pattern on her site as Easy and stated that some very basic beginners sewing skills were required. I would agree with this but there are some curves in the sewing that some beginners might not be comfortable with. There are a lot of tips in the pattern and even more on Sarah's blog.

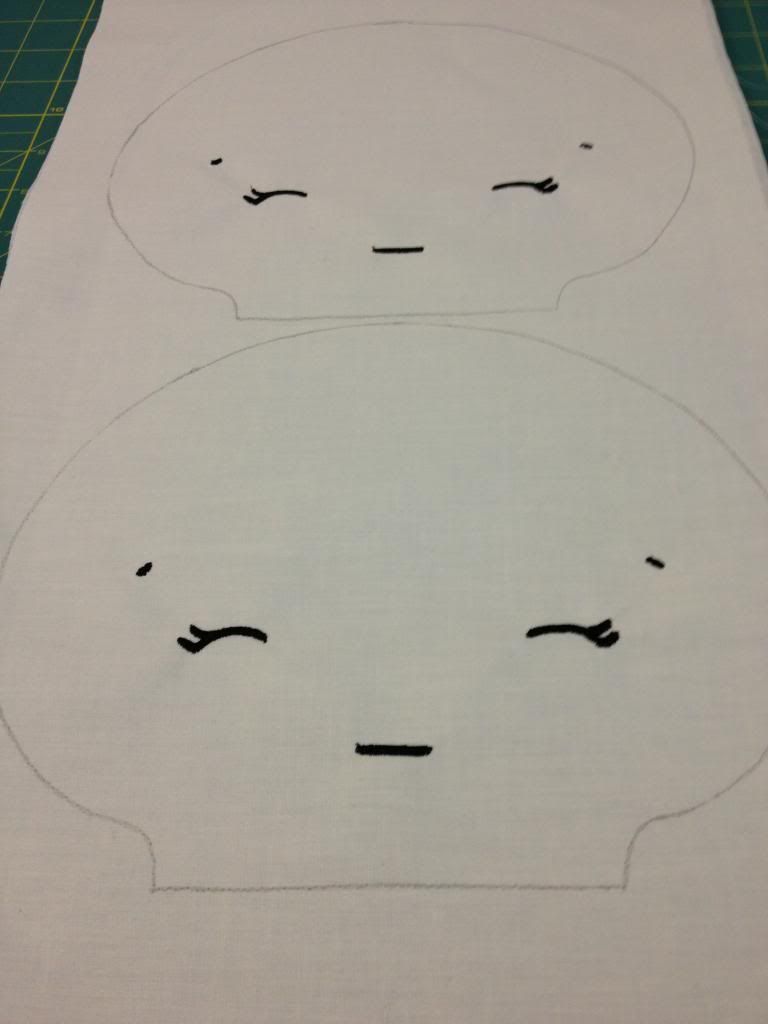
There were several suggestions on making the dolls face from painting, machine stitich and hand embroidery. Hand embroidery seemed to be the recommended method. I, however, uploaded the doll's face into my embroidery digitizing program and created an embroidery file for her face. It was easy for me to do and came out really adorable!


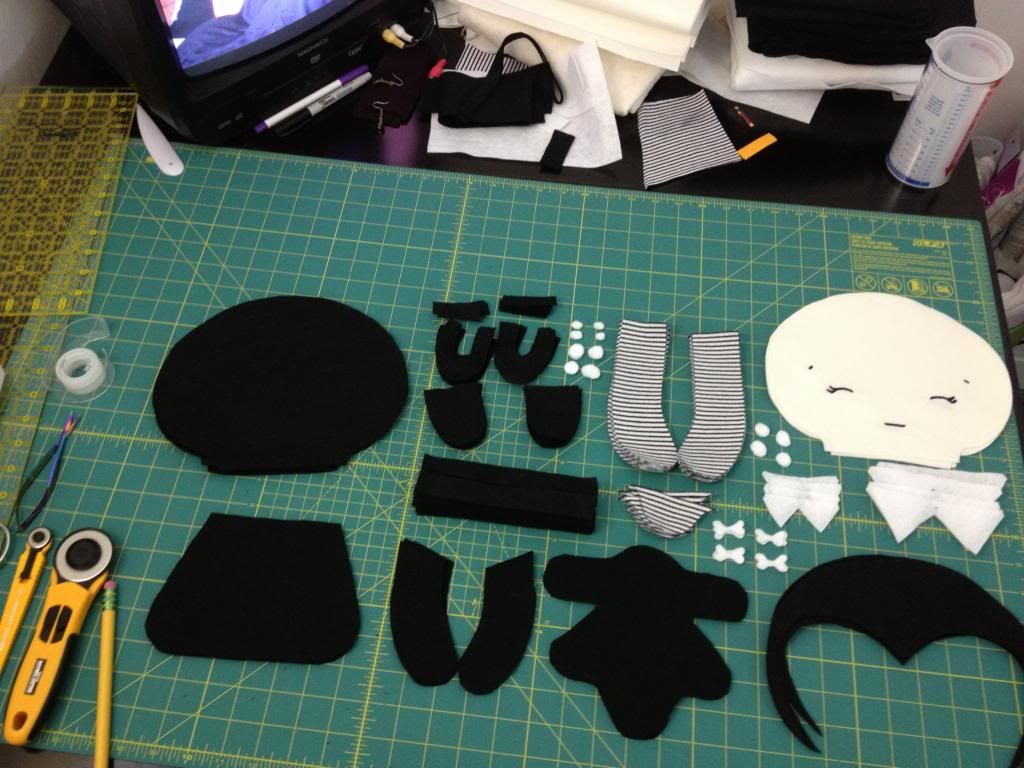
I decided to cut out multiple pieces in case I (1) messed up and (2) wanted to try another sample. If you've never made a doll before I will tell you this - they have A LOT of pieces. By A LOT I mean....A LOT! And I did it 4x. This wasn't a smart use of my time. Next time....cut one, sew one. I don't often make a mistake that I can't pick the stitches out of and fix but I worry and I like a good finished product.


Mistake number one was braiding and sewing her hair too soon. You'll see why at the end.


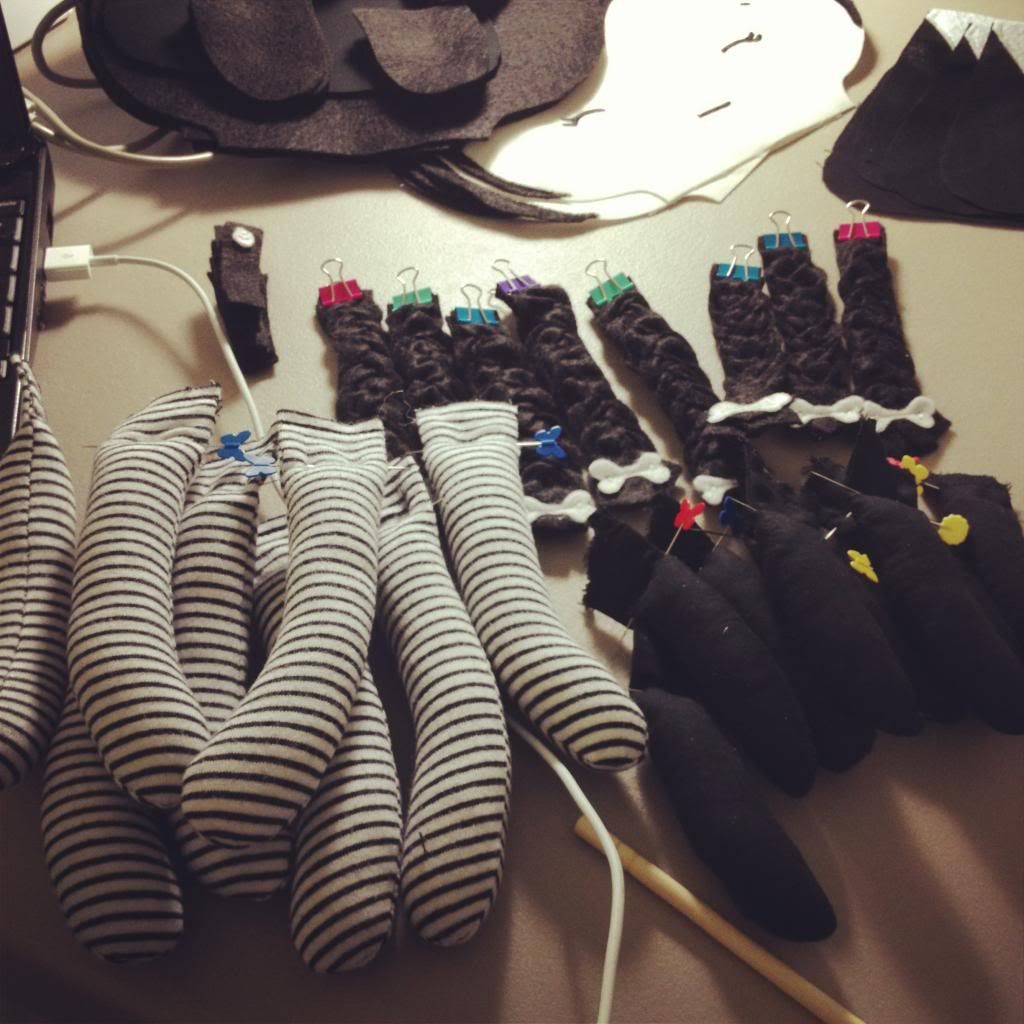
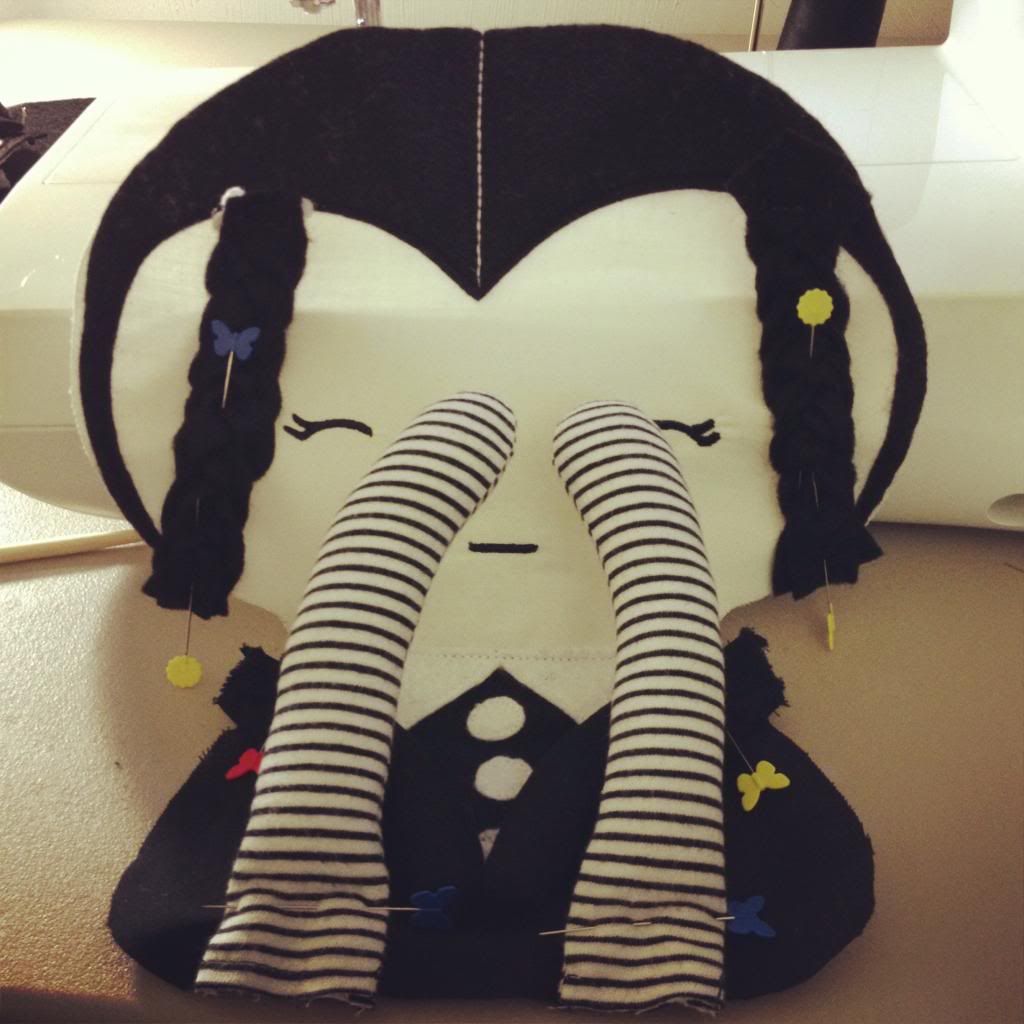
Mistake number two was overstuffing her arms and legs. Why? Well the problem wasn't that her arms stuck out at the end, which they did....they problem was that when she was inside out there was very little room to manipulate her limbs so that I could sew a proper seam. I actually liked the finished look of the limbs but if I keep doing them that way then I will need to make the body slightly larger and move the flipping/stuffing seam to another part of the body. As it is on the pattern it is on the side of the body under one arm. It was also pretty hard to turn her right-side-out with fat arms and legs.


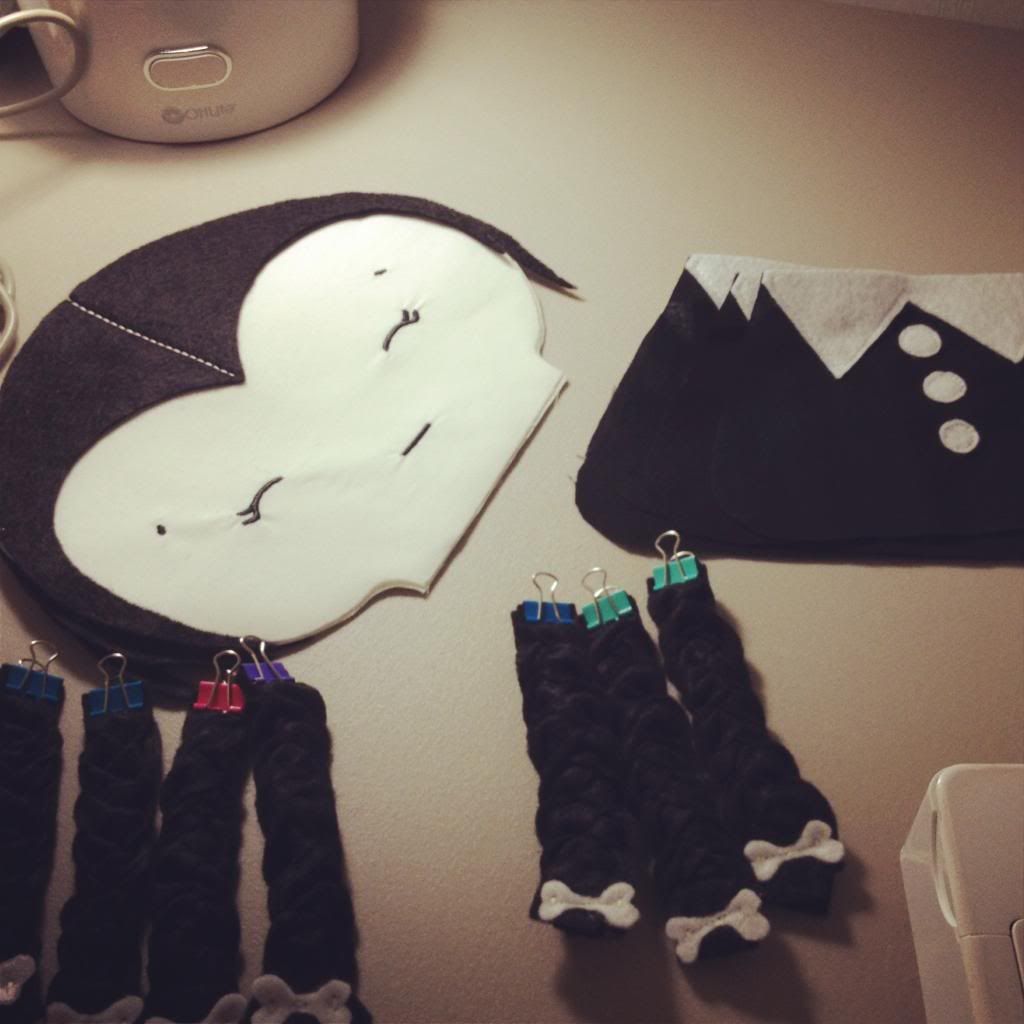
Here she is all folded up just before I put the back on and attempted to attach it.


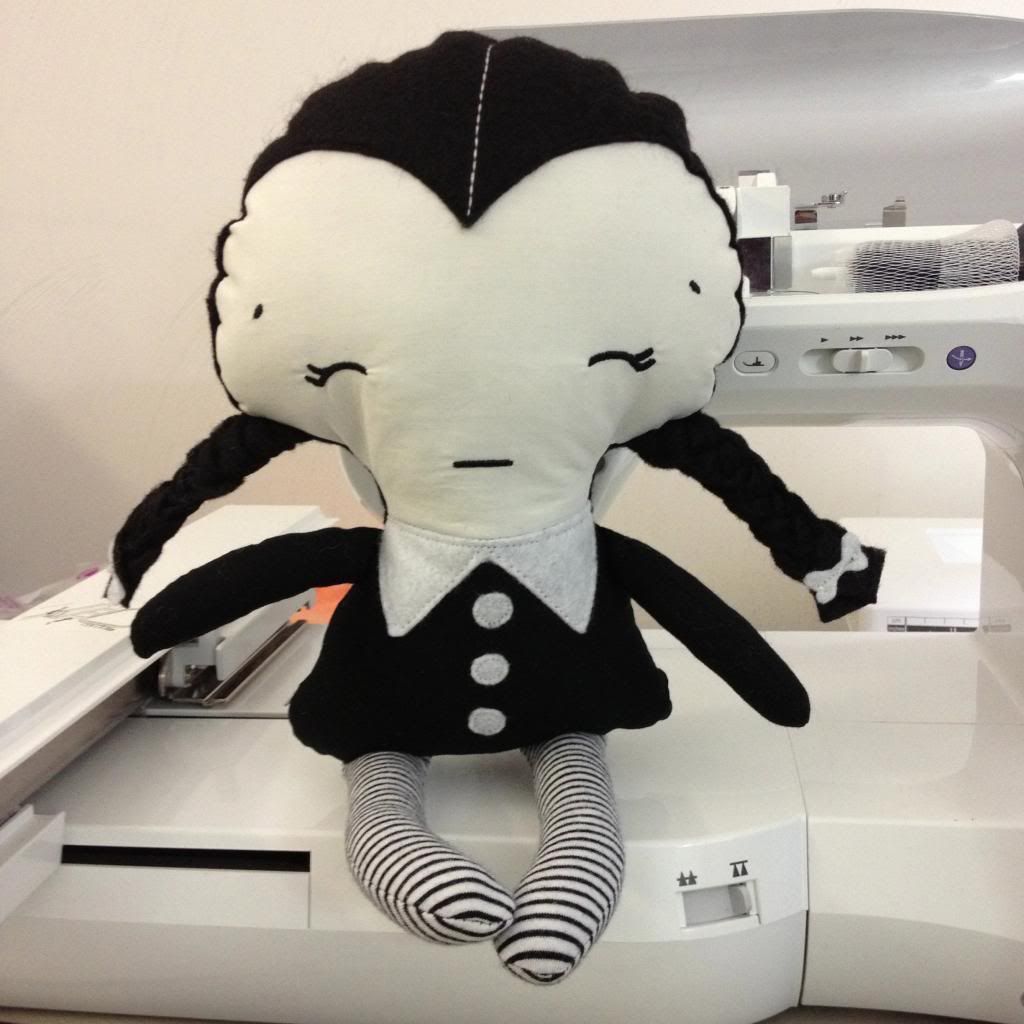
And here she is all finished and stuffed!


At this point it was about 3am on Christmas morning and I was sleepy. So as I was sewing the ladder stitch to close her up I realized I forgot to snip the curves on her head. That's why it looks all lumpy and rippled at the top. Let that be a lesson to anyone who thinks snipping curves isn't important! (FYI- did you just say "Whats a ladder stitch?" Sarah teaches you in a tutorial on her blog!)
Tip: I use pinking shears to snip my curves. It goes much faster than doing each one by hand and it's easier for me to control my distance from the seam.


Now you can see what I was mentioned about her hair. Because I braided and stitched her hair first I had no control over the braids after she was put together so they stick out Pippi Longstocking style. Still cute but not Wednesday.

I am going to make a couple of changes in the future. I am switching a few of the materials. I used craft felt for her hair because that's what I had on hand and it definitely needs to be wool felt. Even for a piece that won't be played with it just isn't durable. And it sheds a lot. I think my lungs might be coated in acrylic felt. I did pick up some wool felt at my local quilt shop. Sarah's pattern does recommend wool felt.

I interfaced the cotton pieces with SF101 and that just wasn't necessary. I think it does need an interfacing but SF101 made it a little stiffer than I liked. I am going to use my favorite alternate Pellon 987F. The slight loft of it will help the fabric move in more of a floppy doll way. The SF101 on her face just made it very tight and when I was stuffing she started to look like she'd been going to Joan Rivers plastic surgeon.

As you can see from the pattern, I did not use plastic buttons on her dress. Why? They seemed to harden up the look. I went with felt pieces and I liked the look of them better. I also think it makes it a little more kid friendly.

And since it was 3am I didn't sew her shoes but they are a very simple construction and I am not concerned with them being a problem.

Overall, I really loved working with the pattern from Dolls and Daydreams. They are a little pricey for a pattern at $12.99. Even for purses I don't typically spend more than $10 for a PDF pattern. But she was just so adorable I couldn't pass it up. And one I started making it and saw there were step-by-step pictures and fool proof (but not for me) instructions I was okay with the price. A lot of hard work went into making pattern that anyone can use and it shows. Had I read through the entre pattern first, followed all of her instructions and taken her fabric suggestions into account I feel I would have had zero problems.

Will I be buying more Dolls and Daydreams patterns? Absolutely. I just counted up my list that I made the other day and there are at least 17 other patterns of hers I want to make.

I hope to have some Wednesday Addams dolls for you all in the shop by mid-January! I want to try another sample before I list anything.

Saturday, November 17, 2012

Puppies, Ideas and Chevrons....Oh My!

It seems like I haven't actually sat at my sewing machine and made anything for a week. I have been working on a lot of things. A lot of time consuming things with intangible finished products. I tend to beat myself up when I can't physically hand something to my husband when he gets home from work and say, "Look what I did today!" It took a lot of time to get this blog set up the way I wanted it. It also takes a lot of time to work on marketing for your shop, answer emails from potential customers, put together sketches and proposals and also keep up with things around your life like cooking and cleaning. He understands and he does see that I am working. I just feel like intangible goods make it harder for me to feel fully accomplished. Do you ever feel like you should have "done more" when in reality you did a lot? So...what have I been doing besides working on the blog? Well I wasn't doing laundry, as evidenced by our overflowing hamper. That will have to be tomorrow's job. I was hanging out with these guys:


Just like kids, sometimes they have bad days and need some extra attention. Sometimes they just want a cuddle and sometimes I do too. I created gift certificates for the shop. You can get there by clicking the SHOP link up in the menu bar. I also set up FREE SHIPPING for all orders over $50. I think I am going to keep it regardless of the holidays. I had a few emails back and forth with Storenvy about setting up a separate APO/FPO shipping category for Military because I would really like to provide free shipping on all Military orders regardless of the amount spent. I was told my suggestion was added to a list for a future update! Awesome customer service by the staff at Storenvy. I was impressed they even took the time to message me back. It made me even happier to be using their platform. Thanks to Cody from Lu & Ed for the suggestion. I received an awesome suggestion from Aradia's Hand about making Fairytale Princess bags. I have it some thought and wasn't sure it was the direction I wanted to go in. Then later that day I was in the shower and I was thinking about it and wondering what I could do other than embroider or applique bags for fairytales and I thought....well what if I made a bag that looked like each character. So I spent the rest of the night brainstorming and sketching each character if they were a bag or purse. Still confused? Ask yourself this..."If Snow White were a purse, what kind of purse would she be and what would she look like?" And with that inspiration I came up with these sketches. Not all of them are Princesses. I am just going with Fairytale characters. See one I don't have. Make a suggestion in the comments!


I picked up the fabrics to make the samples. Can you guess which fabric is which character?


I cooked yesterday. Most of the day actually. And took pics so that I can post my homemade perogie recipe for all of you. I am hoping to have it up by tomorrow night. Lastly, I went to one of my favorite local fabric shops today called Fabric Hut. It's a bit of a drive from my house but it was worth it. It's an impressively large fabric store. One side is all apparel and the other cotton. In the center are notions and knitting. They even have a machine department and specialize in Elna. I don't know much about those machines but they are dealer manufactured and that is always a better quality machine. This is the kind of store that stocks every single color made by Kona. Every. Single. Color. I love to wander around the rainbow rows of fabric and look at the thousands of bolts. Today I fell into a sea of chevron and came home with these fat quarters. Hello chevron beauties.


I have a long list of things that need done. Finishing touches on some custom projects and lots of orders going out in the mail next week! Take care!

Tuesday, November 13, 2012

Meet Me

Hello there!

Look at me, I started a blog. I assume you came here wondering who I am and what this is all about.  Let's start with me.

I make things. More specifically, I sew, hand embroider and machine embroider. Mostly purses/bags and some home decor. I am always brainstorming for new ideas.

This is me.


I'm a Pittsburgh native and moved to Virginia Beach in 2010. My husband is in the Navy and recently we purchased our first home in Chesapeake.

I first started sewing in middle school. Every six weeks we switched to a different shop/home ec/art type class and one of them was sewing. The first couple of years we did things like plastic canvas cross stitch and latch hook. Personally, I enjoyed wood and metal shop more. Then probably around seventh grade we finally got to use the sewing machines. It was great and I wanted to make everything I could think of, and I had even asked for a machine for home. My joy was short lived because the teacher was scary and was always screaming at everyone. So by the time Christmas came and I was asked if I still wanted a sewing machine, I said no.

Fast forward about 16 years. I had lost a large amount of weight and all of my clothes were saggy and baggy. I didn't really have enough money to replace them, so what's a girl to do? I borrowed a friend's sewing machine. It was her Grandmother's and this baby was heavy. It may have been made entirely of metal. I definitely showed some muscle lugging that brut up three flights of stairs to my apartment. And with no training or apparel experience, I proceeded to take in all of my clothes. I also made my Halloween costume that year too!


And then that was the end of that for about seven years. A lot can happen in seven years. I got a couple of college degrees in Accounting and Business Management. I supervised the Accounting Department for a Telecom company and I managed to fall in love and move to Virginia. You never really know where life is going to send you, but sometimes you just have to go with it.

In May of 2011, Hubs left for a seven month deployment. I didn't really know anyone here and I wasn't working at the time, so I found myself with a lot of free time. I owned a sewing machine and for my birthday that April I had asked for a serger. I'm not sure why, since I hadn't sewn anything in years, but I suppose I had good intentions.  So I pulled them out and set them up. I then spent days and days online finding patterns and going to Joann's for fabric and thread. I read book after book on how to sew. Finally, after several weeks of "research" I sat down and made a bag for a friend's birthday present.


We call it the Dead Bears Bag and she still carries it to this day. It is well loved. And I didn't use one of those hundreds of patterns I looked through. I do have a pattern for it though. Mostly because she has asked me to make four more since that time. I plan on posting a tutorial for it one day.

So I kept sewing and sewing. And before I knew it, I had a tote full of bags. A lot of people got purses for Christmas last year. A lot. Thankfully they still use them. But, I still had a ton left and kept making more. I talked and talked about opening a store online and just didn't. I also taught some classes on making purses at a local quilting shop.

In February of last year, I upgraded from a Sears off the shelf Singer sewing machine and a Brother off the shelf serger to a BabyLock sewing machine, as well as a serger. These machines are amazing. And it really does change the quality of your work to have a good machine that is properly calibrated and timed to create beautiful stitches. Because of the change in the quality of my work I opened a shop. It was casual and a when I had time, kind of venture. In the last few months I have taken it on full-time and am working hard to design new and fun things that I hope people will love. You can get to the shop from the link at the top of the page!

Most recently, I purchased a Brother embroidery machine. It's amazing. I love being able to add designs to my creations. I have also started learning to digitize my own artwork to stitch out on the machine too! It's a lot of fun to see a drawing come to life in stitches as the machine runs.


I hope that I am able to share things with you that are amusing, interesting and that you want to read. Please ask me any questions you would like. I tend to be an open book. And follow me on Twitter and Facebook for more fun pictures and posts!

Until next time!